
[2023/03/30] First Start.
소나무 기운 , 전자제품 개발/생산
ESP32 4.3" TFT-LCD HMI - 6. lvgl examples 1
이번에는 lvgl(Light and Versatile Embedded Graphics Library)를 사용한 예제를 다뤄보도록 하겠습니다.
여러가지 플렛폼에 적용가능한 가볍고, 쉽고, 아름다운 UI/UX를 제작할 수 있다고 합니다.
전용 디자인툴인 스퀘어라인 스튜디오 등을 사용하여 쉽게 작업이 가능하다고 합니다.
관련 세부 사항은 공식 홈페이지 ( https://lvgl.io/ )를 확인하시기 바랍니다.
LVGL - Light and Versatile Embedded Graphics Library
LVGL is the most popular free and open source embedded graphics library targeting any MCU, MPU and display type to build beautiful UIs. It's boosted by a professional yet affordable drag and drop UI editor, called SquareLine Studio. We also do services lik
lvgl.io
LvglBenchmark.ino 살펴봅니다.
컴파일 하고 다운로드 하기전에 파일 내용을 좀 살펴보겠습니다.
컴파일 전에 사전 작업이 필요한 사항입니다.
내용은 아래와 같습니다.
/*******************************************************************************
 * LVGL Benchmark
 * This is a benchmark demo for LVGL - Light and Versatile Graphics Library
 * import from: https://github.com/lvgl/lv_demos.git
 *
 * Dependent libraries:
 * LVGL: https://github.com/lvgl/lvgl.git
 *
 * LVGL Configuration file:
 * Copy your_arduino_path/libraries/lvgl/lv_conf_template.h
 * to your_arduino_path/libraries/lv_conf.h
 * Then find and set:
 * #define LV_COLOR_DEPTH     16
 * #define LV_TICK_CUSTOM     1
 *
 * For SPI display set color swap can be faster, parallel screen don't set!
 * #define LV_COLOR_16_SWAP   1
 *
 * Optional: Show CPU usage and FPS count
 * #define LV_USE_PERF_MONITOR 1
 ******************************************************************************/
LVGL의 benchmark demo를 가져와서 사용하게 됩니다.
lv_conf_template.h 를 lv_conf.h로 복사해서 사용하라고 되어 있습니다.
복사한 후에는 LV_COLOR_DEPTH , LV_TICK_CUSTOM, LV_COLOR_16_SWAP등을 수정해서 사용하라고 합니다.
이 과정을 미리 해서 만들어 놓은 파일을 같이 제공하고 있습니다.
파일의 내부에 "LVGL configuration replacement file" 폴더안에 lv_conf.h 파일이 들어 있어서 이것을 사용면 됩니다.이 lv_conf.h파일을 살펴보면
이렇게 간단히 이 파일을 lvgl폴더에 복사해서 사용하라고 되어 있습니다.따라해 보시죠.
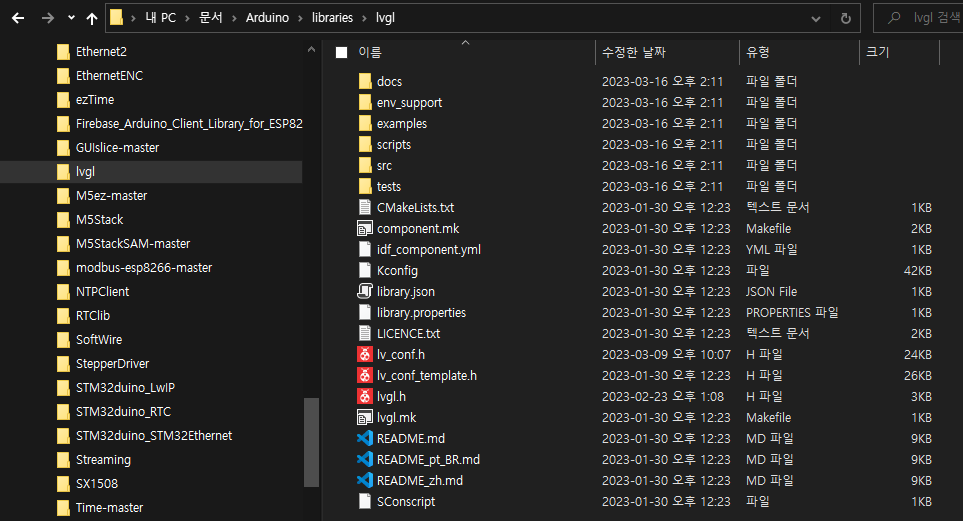
아두이노 라이브러리 내에 lvgl폴더 안에 복사해 주면 됩니다.위치는 다음과 같습니다. C:\Users\UserName\Documents\Arduino\libraries\lvgl
소스 내용을 보기전에 동작 상태를 같이 한번 보시죠.
96가지의 시험을 하고 각 시험이 몇 프레임씩 작업이 되는지 측정하고 결과를 표시해 줍니다.
소스코드 살펴보기
기본적으로 코드는 lv_demo_bencmark는 lvgl 라이브러리 내에 있는 프로그램을 호출하는 식으로 동작합니다.
lvglbenchmark.ino파일 내에는 특별한 내용은 없습니다.setup()에서 benchmark 함수를 호출해 주는 것으로 끝입니다.
/* Display flushing */
void my_disp_flush(lv_disp_drv_t *disp, const lv_area_t *area, lv_color_t *color_p)
{
   uint32_t w = (area->x2 - area->x1 + 1);
   uint32_t h = (area->y2 - area->y1 + 1);

#if (LV_COLOR_16_SWAP != 0)
   gfx->draw16bitBeRGBBitmap(area->x1, area->y1, (uint16_t *)&color_p->full, w, h);
#else
   gfx->draw16bitRGBBitmap(area->x1, area->y1, (uint16_t *)&color_p->full, w, h);
#endif

   lv_disp_flush_ready(disp);
}

void setup()
{
   Serial.begin(115200);
   // while (!Serial);
   Serial.println("LVGL Benchmark Demo");

   // Init Display
   gfx->begin();
   gfx->fillScreen(BLACK);

#ifdef TFT_BL
   pinMode(TFT_BL, OUTPUT);
   digitalWrite(TFT_BL, HIGH);
#endif

   lv_init();

   screenWidth = gfx->width();
   screenHeight = gfx->height();
#ifdef ESP32
   disp_draw_buf = (lv_color_t *)heap_caps_malloc(sizeof(lv_color_t) * screenWidth *screenHeight/4, MALLOC_CAP_INTERNAL | MALLOC_CAP_8BIT);
#else
   disp_draw_buf = (lv_color_t *)malloc(sizeof(lv_color_t) * screenWidth * screenHeight/4);
#endif
   if (!disp_draw_buf)
   {
      Serial.println("LVGL disp_draw_buf allocate failed!");
   }
   else
   {
      lv_disp_draw_buf_init(&draw_buf, disp_draw_buf, NULL, screenWidth * screenHeight/4);

      /* Initialize the display */
      lv_disp_drv_init(&disp_drv);
      /* Change the following line to your display resolution */
      disp_drv.hor_res = screenWidth;
      disp_drv.ver_res = screenHeight;
      disp_drv.flush_cb = my_disp_flush;
      disp_drv.draw_buf = &draw_buf;
      lv_disp_drv_register(&disp_drv);

      /* Initialize the (dummy) input device driver */
      static lv_indev_drv_t indev_drv;
      lv_indev_drv_init(&indev_drv);
      indev_drv.type = LV_INDEV_TYPE_POINTER;
      lv_indev_drv_register(&indev_drv);

      lv_demo_benchmark();

      Serial.println("Setup done");
   }
   last_ms = millis();
}

void loop()
{
   lv_timer_handler(); /* let the GUI do its work */
   delay(5);
}
이렇게 실제 소스의 내용은 별반 내용이 없습니다.
benchmark 결과 알아보기
benchmark의 결과는 마지막 화면에 표시됩니다.
자세한 설명은 github를 찾아보면 알 수 있습니다.
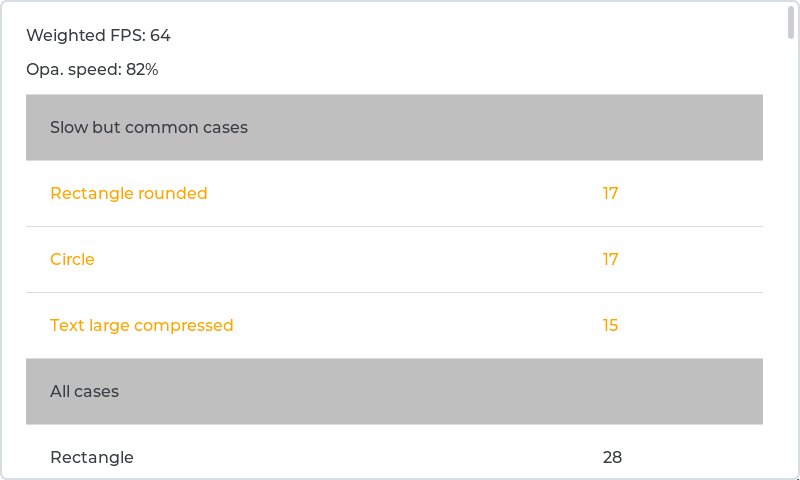
위 예시처럼 표현이 됩니다.
"Weighted FPS : 64" 가중치 FPS로 일반적인 사용의 화면이 더 가중치가 높습니다.
"Opa. speed: 82%" 불투명한 렌더링이 18%만큼 더 느림을 의미합니다.
"Slow but common cases" 느리지만 일반적인 경우 FPS가 20 미만인 경우 표시 됩니다.
10FPS 미만은 빨강, 11 ~ 20FPS 는 주황으로 표시됩니다.
그럼. ESP32-S3를 사용한 HMI는 결과가 어떨까요?

오!! 아주 좋습니다.
일반적인 동작에서 87FPS가 나오네요. 쾌적한 HMI환경을 만들어 낼 수 있겠습니다.
https://github.com/lvgl/lv_demos/tree/master/src/lv_demo_benchmark
GitHub - lvgl/lv_demos: Examples, tutorials and applications for the LVGL embedded GUI library
Examples, tutorials and applications for the LVGL embedded GUI library - GitHub - lvgl/lv_demos: Examples, tutorials and applications for the LVGL embedded GUI library
github.com
마무리
내부 코드까지 살펴보지는 않았습니다. 이번 강좌의 목적은 ESP32-S3를 이용하여 HMI를 만드는 것이니 목표에 집중하도록 하겠습니다.
benchmark 확인 결과 87FPS가 나옵니다. 이후 다른 LCD를 사용하는 제품에서도 benchmark를 활용하여 적정한 성는이 나오는지를 확인하고 LCD를 선택하시면 되겠습니다.
참고문헌
다음에는 마지막 예제 프로그램입니다.
lvgl sidgets 예제를 살펴보겠습니다. 이 예제에서는 touch도 동작을 합니다. 기대해 주세요.
틀린 부분이나 질문은 댓글 달아주세요.
즐거운 하루 보내세요. 감사합니다.
'ESP32' 카테고리의 다른 글
| [강좌]ESP32 4.3" TFT-LCD HMI - 8. lvgl + PlatformIO example (0) | 2023.04.11 |
|---|---|
| [강좌]ESP32 4.3" TFT-LCD HMI - 7. lvgl 예제 살펴보기 2 ( lvgl examples 2 ) (0) | 2023.04.04 |
| [강좌]ESP32 4.3" TFT-LCD HMI - 5. TFT 예제 살펴보기 2(Explore Examples 2) (0) | 2023.03.30 |
| [강좌]ESP32 4.3" TFT-LCD HMI - 4. TFT 예제 살펴보기(Explore Examples) (7) | 2023.03.27 |
| [강좌]ESP32 4.3" TFT-LCD HMI - 3. 데모 프로그램 라이팅(Demo binary writing) (0) | 2023.03.23 |


댓글