VSCode에 C++, C 컴파일리러를 설치하고 공부해 보자.
우선 VS코드 설치하자
https://code.visualstudio.com/download
Download Visual Studio Code - Mac, Linux, Windows
Visual Studio Code is free and available on your favorite platform - Linux, macOS, and Windows. Download Visual Studio Code to experience a redefined code editor, optimized for building and debugging modern web and cloud applications.
code.visualstudio.com
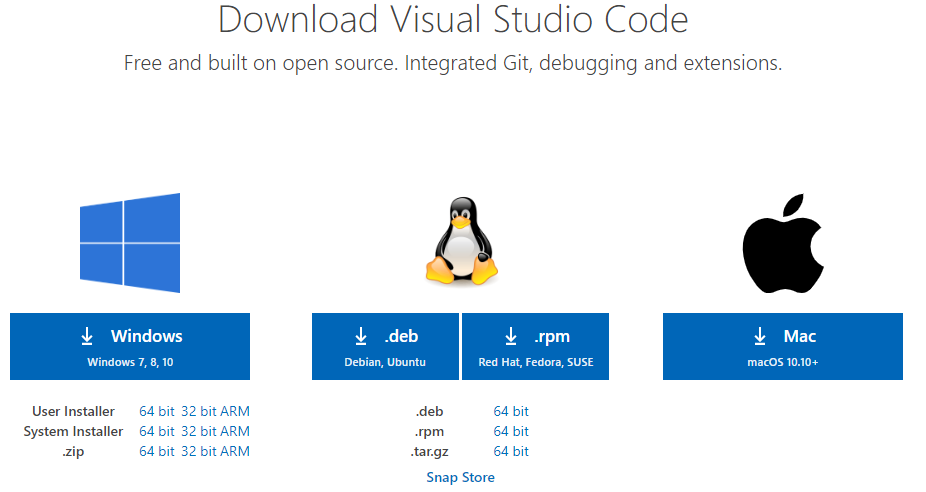
기본 설치 관련해서는 많이 많이 있으니 다음다음 눌러서 설치하자.
기본 설치 후 실행해 보자.
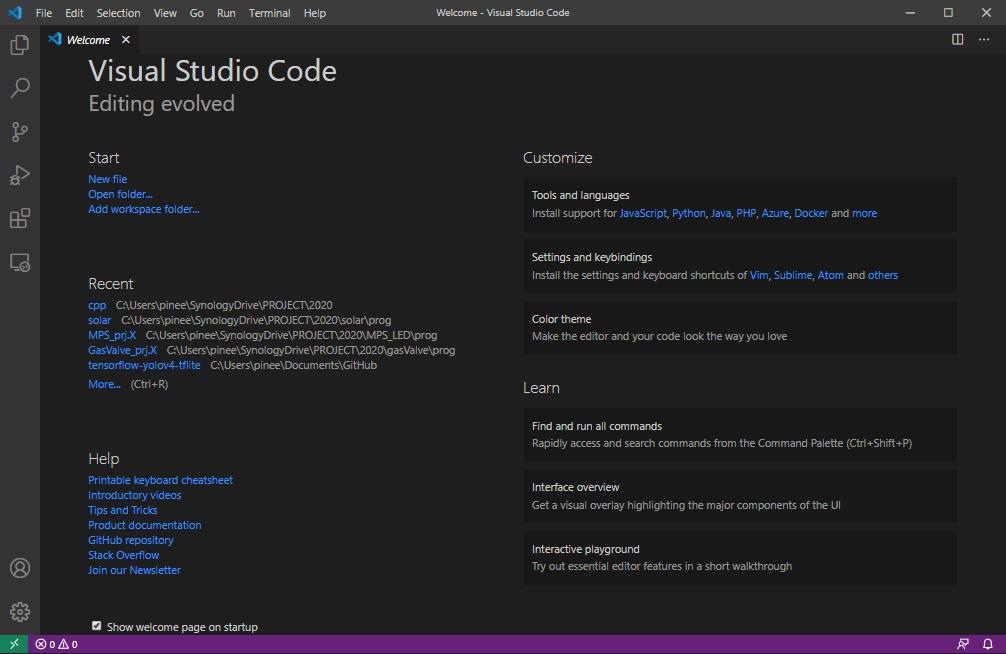
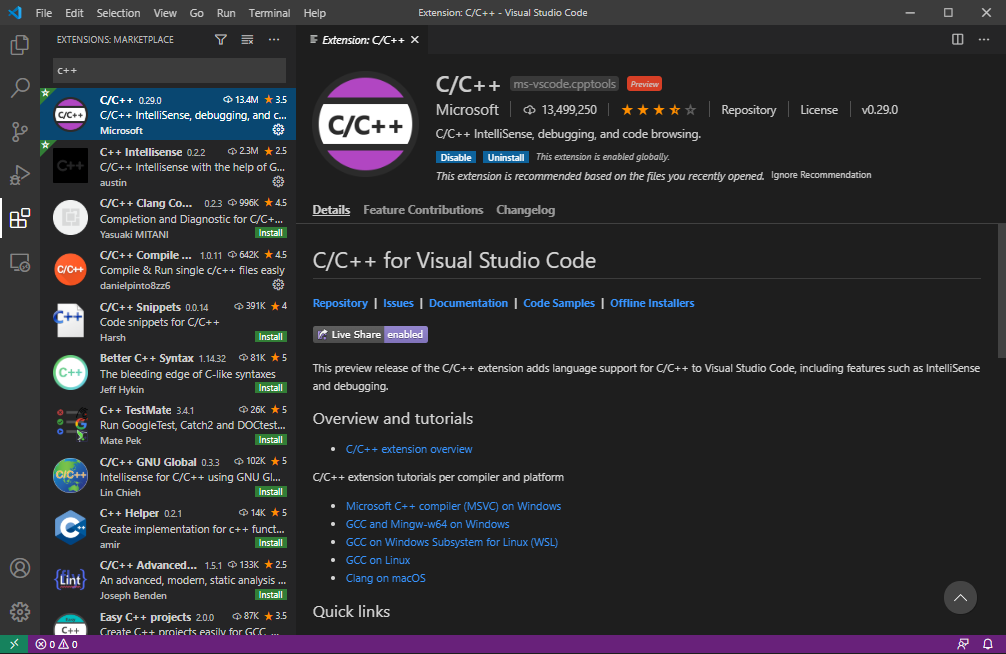
C/C++ 확장 프로그램을 설치 합니다.
검색하여 "Install"누르면 끝.
컴파일러를 설치하자
C, C++용 컴파일 다운받아 설치 합니다.
Window용인 MinGW를 사용해요.
https://sourceforge.net/projects/mingw/files/
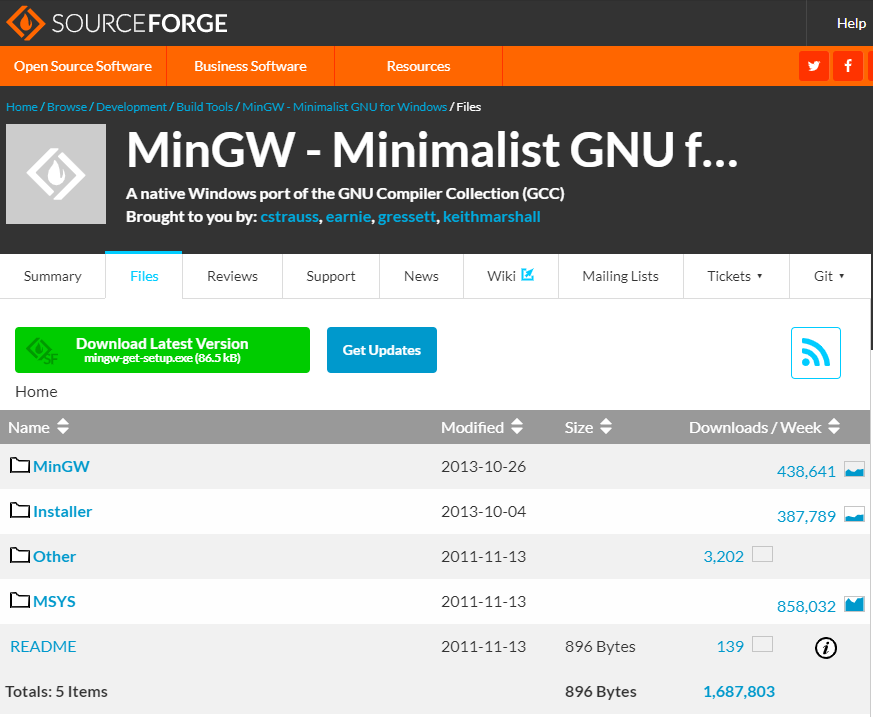
" Download Lastest Version " 을 선택 다운로드 받아요.
다운로드 매니저가 실행되면 3가지만 선택해요.
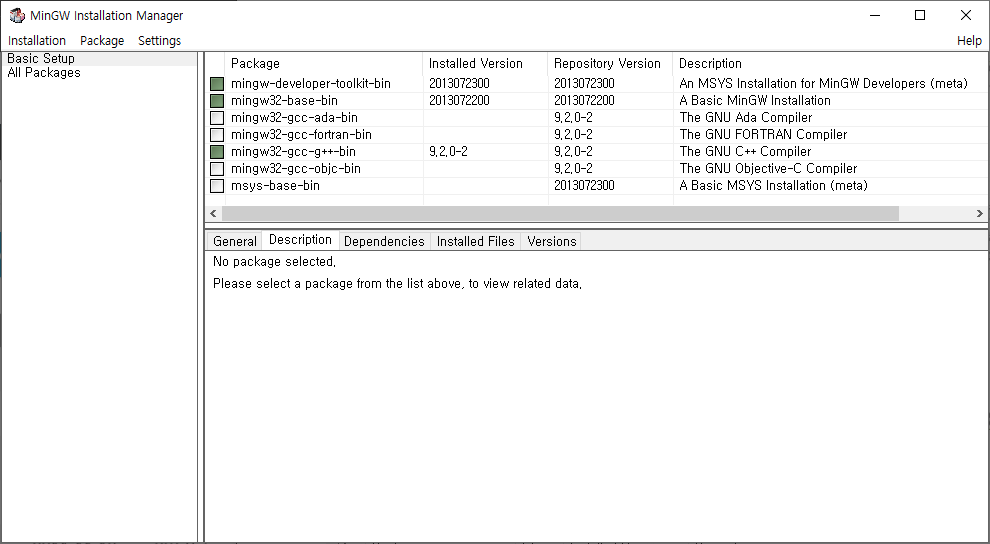
ingw-developer-tookit-bin, mingw32-base-bin, mingw32-gcc-g++-bin 정도 선태해 주면 됩니다.
선택방법은 해당 이름 위에서 "Mark for Installration"을 선택 후 Installration>Apply Changes를 눌러줍니다.
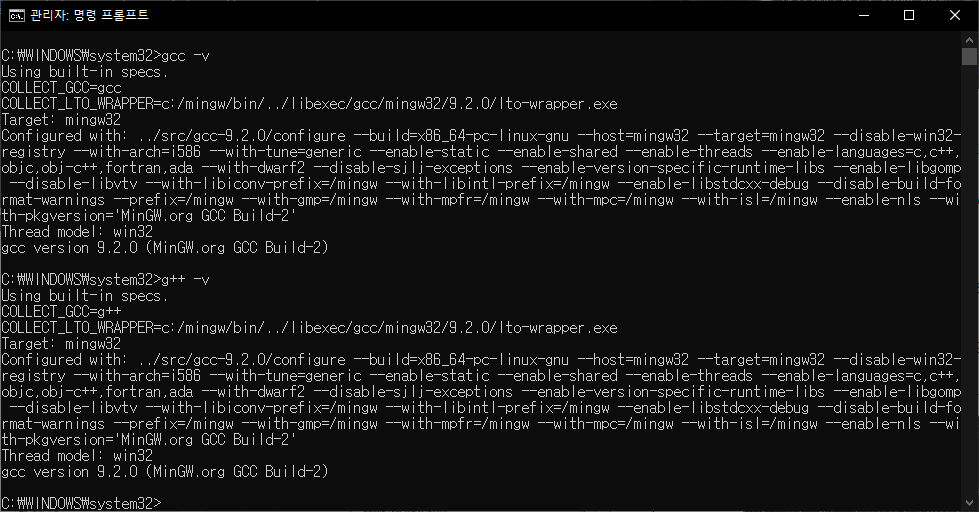
설치가 완료되면 이제 환경변수에 등록해요.
컴파일러가 어디서든 동작할 수 있도록 Path를 걸어줍니다.
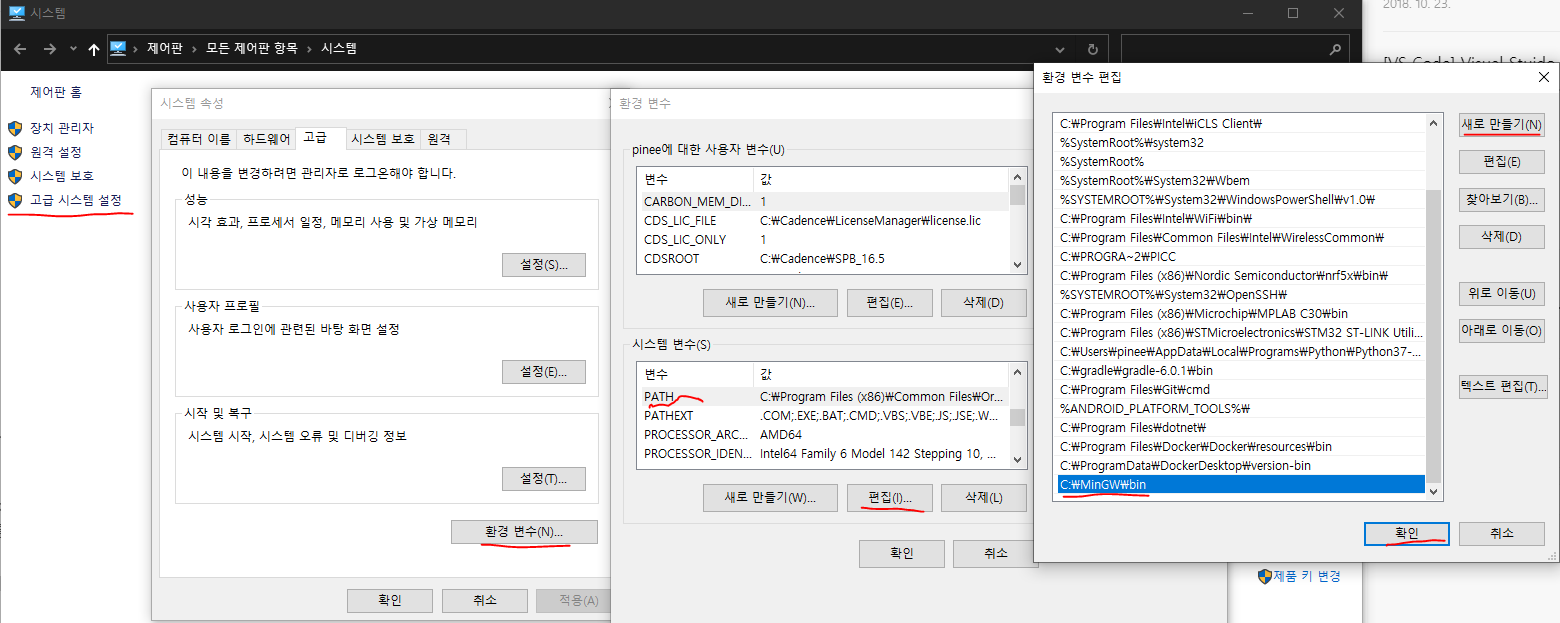
탐색기>내컴퓨터 속성> 고급시스템설정 > 환경 변수 > PATH > 편집 > 새로만들기 > C:\MinGW\bin > 확인
이 순서에요.
VSCode는 폴더단위로 프로젝트를 관리합니다.
새폴더를 만들고 새파일을 만들어서 cpp.cpp로 저장해 줍니다.
간단히 코드를 넣어보죠.
#include <iostream>

using namespace std;

int main()
{
    cout << "Hello" << endl;
    return 0;
}
ctrl+alt+b를 눌러 컴파일 합니다.
tasks.json파일을 만들라고 나옵니다.
이곳에 복사 하세요.
{
	"version": "2.0.0",
	"runner": "terminal",
	"type": "shell",
	"echoCommand": true,
	"presentation": {
		"reveal": "always"
	},
	"tasks": [
		//C++ 컴파일
		{
			"label": "save and compile for C++",
			"command": "g++",
			"args": [
				"${file}",
				"-o",
				"${fileDirname}/${fileBasenameNoExtension}"
			],
			"group": "build",
			//컴파일시 에러를 편집기에 반영
			//참고:   https://code.visualstudio.com/docs/editor/tasks#_defining-a-problem-matcher
			"problemMatcher": {
				"fileLocation": [
					"relative",
					"${workspaceRoot}"
				],
				"pattern": {
					// The regular expression.
					//Example to match: helloWorld.c:5:3: warning: implicit declaration of function 'prinft'
					"regexp": "^(.*):(\\d+):(\\d+):\\s+(warning error):\\s+(.*)$",
					"file": 1,
					"line": 2,
					"column": 3,
					"severity": 4,
					"message": 5
				}
			}
		},
		//C 컴파일
		{
			"label": "save and compile for C",
			"command": "gcc",
			"args": [
				"${file}",
				"-o",
				"${fileDirname}/${fileBasenameNoExtension}"
			],
			"group": "build",
			//컴파일시 에러를 편집기에 반영
			//참고:   https://code.visualstudio.com/docs/editor/tasks#_defining-a-problem-matcher
			"problemMatcher": {
				"fileLocation": [
					"relative",
					"${workspaceRoot}"
				],
				"pattern": {
					// The regular expression.
					//Example to match: helloWorld.c:5:3: warning: implicit declaration of function 'prinft'
					"regexp": "^(.*):(\\d+):(\\d+):\\s+(warning error):\\s+(.*)$",
					"file": 1,
					"line": 2,
					"column": 3,
					"severity": 4,
					"message": 5
				}
			}
		},
		// // 바이너리 실행(Windows)
		{
			"label": "execute",
			"command": "cmd",
			"group": "test",
			"args": [
				"/C",
				"${fileDirname}\\${fileBasenameNoExtension}"
			]
		}
	]
}
Ctrl + Shift + B 를 선택하여 컴파일을 진행하면 실행파일이 생겨요.
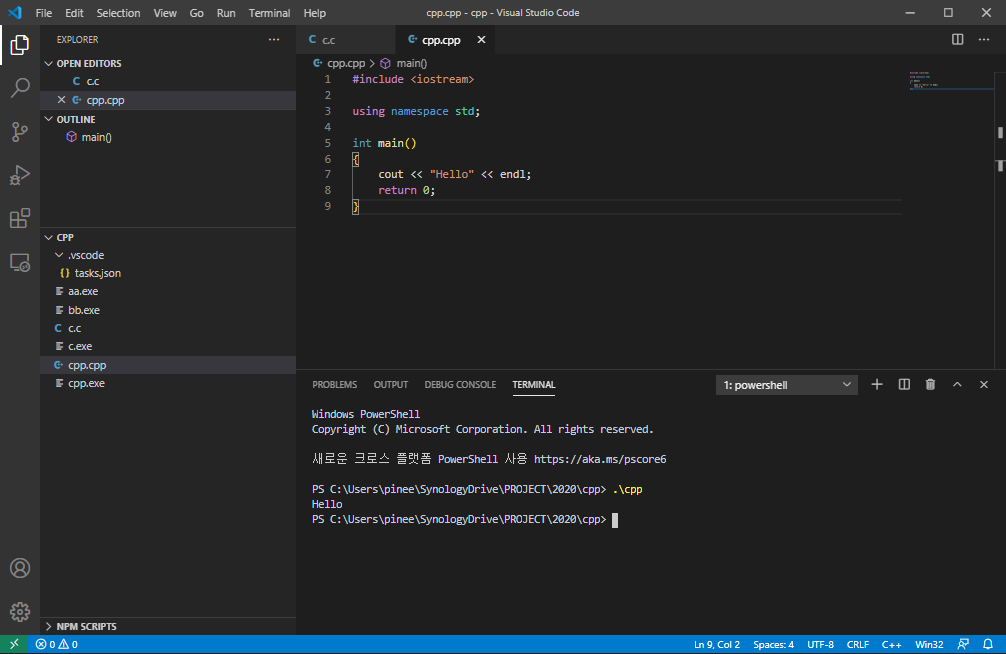
cpp.cpp 파일을 선택하고 컴파일하면 cpp.exe로 검파일 완료후 실행파일 생성 되요.
그럼 터미널 창에서 .\cpp을 입력하여 실행하면 잘 동작 됩니다.
위 화면에서 cpp.cpp파일 cpp.exe을 볼수 있고 Terminal에서 cpp.exe실행하여 결과를 볼수 있어요.
꼭 주의 할것은 cpp.exe말고 .\cpp.exe로 실행해야해요.
태풍도 지나가고 오랜만에 맑아졌습니다. ^^
'Tips, Infomation > Coding Editor' 카테고리의 다른 글
| [VSCode] VS Code를 마우스 오른쪽 버튼에 등록 하기 (2가지 방법) (9) | 2020.12.28 |
|---|---|
| [VSCode 팁] 단축키 누르는 법 Ctrl + K W (0) | 2020.12.28 |
| [VSCODE] Clang-Format 일부분 적용 안하기 (0) | 2020.11.17 |
| Atollic true Studio 단축키. (0) | 2020.05.28 |
| VSCODE 단축키 (0) | 2020.05.26 |


댓글